We’re going to see step-by-step how to use the moisture sensor.
This tutorial is made to be used with the supplies from the Gamebuino accessory pack
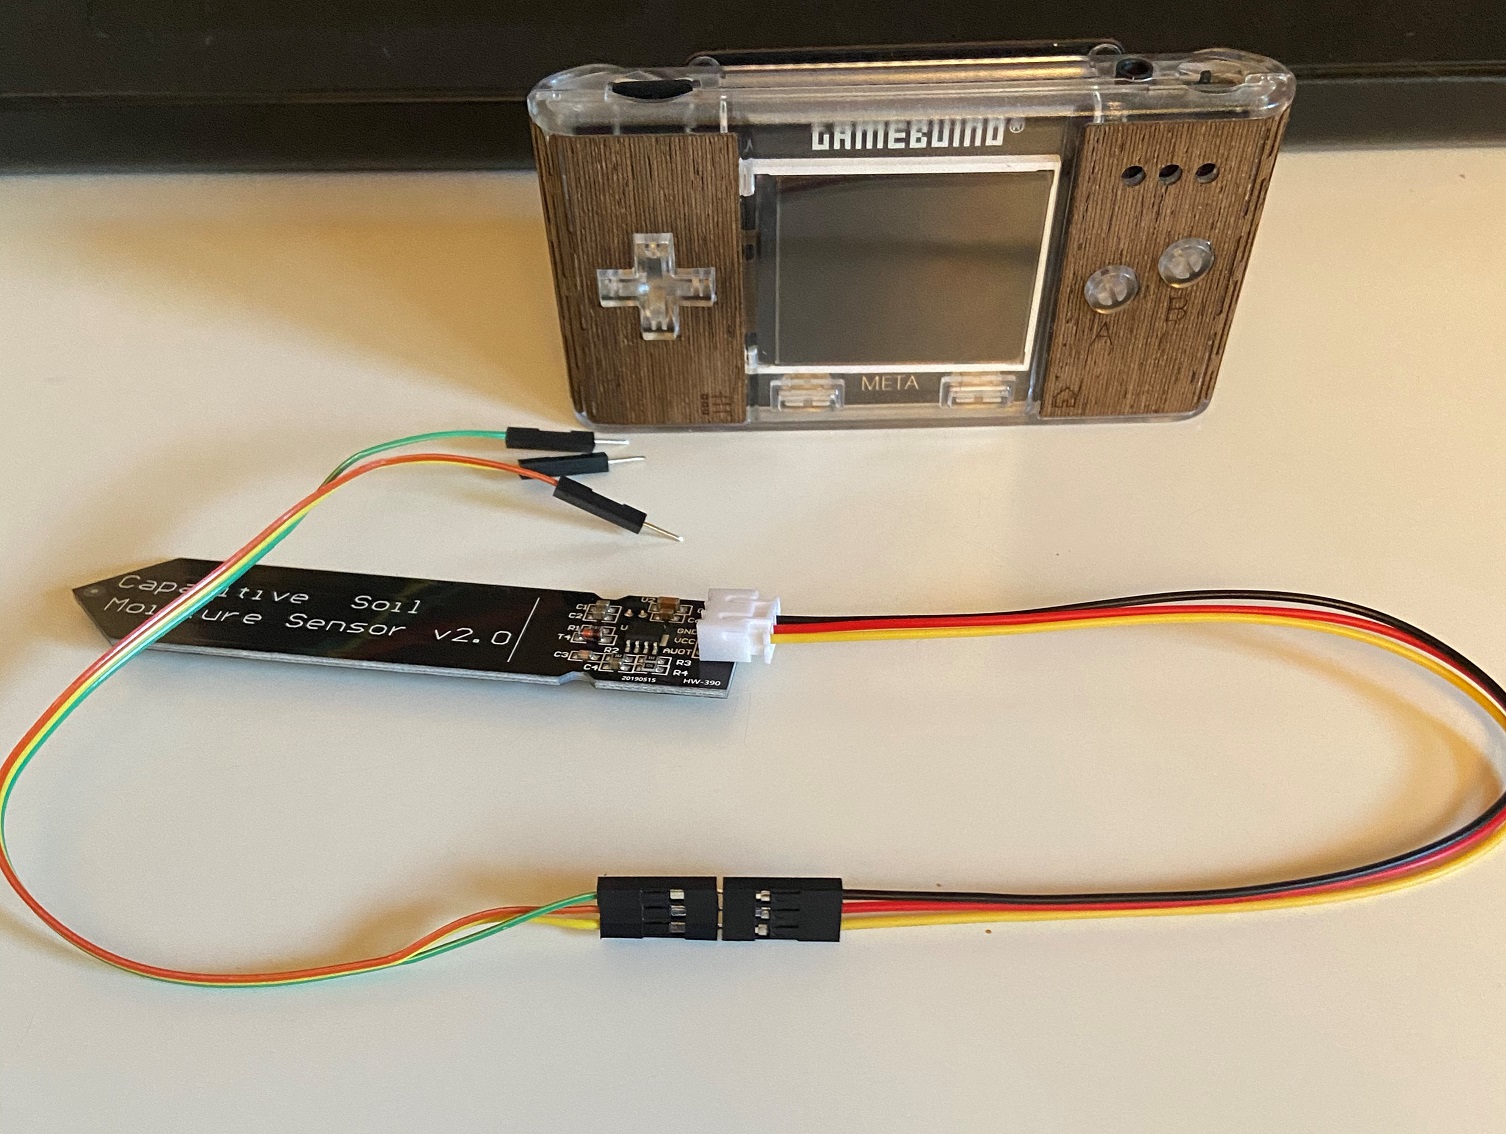
For this tutorial you will need :
- A Gamebuino META
- A soil moisture sensor
- A computer with the Arduino IDE installed
If you haven’t installed it yet, please refer yourself to the following page for easy setup :
Get started (C++ 1/5) : Quick software setup - Gamebuino
Step 1 : easy start
First thing first, open the preconfigured Arduino IDE for Gamebuino
- You should see the following on your screen :
void setup() {
  // put your setup code here, to run once:
}

void loop() {
  // put your main code here, to run repeatedly:
}
This seems a little empty for now, we’re going to fill it up.
*Before anything else we need to add the following line at the start of our file :
#include <Gamebuino-Meta.h>
This is called a “library”, it will allow us to use a whole bunch of functions without the need to manually code them. This specific library contains all the Gamebuino functions and will be very useful for what’s coming next.
We need to add two functions to make our program work :
- In the setup() function we make a call to the gb.begin() function as follows :
void setup() {
  // put your setup code here, to run once:
  gb.begin();
}
The gb.begin() function initializes the console : without it nothing will work !
- Then we add the gb.waitForUpdate function in our main loop() function :
void loop() {
  // put your main code here, to run repeatedly:
  gb.waitForUpdate();
}
The gb.waitForUpdate() function allows for screen content refreshing (drawing things on it), handles sounds, buttons presses, in short everything needed for the console to come to life.
We now have a functionnal program structure, although it does nothing at the moment.
Step 2 : Get a reading from the moisture sensor
- To get a reading we will declare a get_sensor() function as such :
int get_sensor() {

}
The moisture sensors includes an electronic card that sends back an analogic signal which intensity is proportionnal to moisture. To read this measurement with the Gamebuino we will use the Arduino function analogRead(). The analogRead() function gives access to the Analog to Digital Converter (ADC) of the processor, which transforms an analog value (a physical measurement) to a digital value between 0 and 1023 that the processor can understand.
- We have to specify in to the analogRead() function from which pin we want to read a value : since we plugged our sensor output to the A1 pin we want a reading from the A1 pin with the analogRead(A1) function :
int get_sensor() {
  int i32_sensor_value = analogRead(A1); // reads from analog pin A1
  return i32_sensor_value ;               // returns the read value
}
Step 3 : displaying the value
- We’ll create a simple display function using the Gamebuino library :
void  draw_sensor_output( int i32_value ) {
  gb.display.clear();
  gb.display.print( "measure = " );  // displays the text "measure = "
  gb.display.print( i32_value );    // displays the content of the variable i32_value
}
The function gb.display.clear() clears the screen. Without it the consecutive images (or frames) would “pile up” and become messy wery quickly.
The function gb.display.print() can display a variable’s value or text on the screen.
Our function draw_sensor_output() allows us to display both a small line of text and a value (our measurement value).
We can now call our two custom functions get_sensor() and draw_sensor_output() in the main function loop(). As the names suggests the loop() function is called and executed in a loop indefinitely.
void loop() {
  // put your main code here, to run repeatedly:
  gb.waitForUpdate();
  int i32_value = get_sensor();  // Get a value measurement from the sensor
  draw_sensor_output( i32_value );        // Display it on screen
This way both our functions are called and executed on each iteration of the loop() function.
Compiling our program and uploading it to the console should turn out like this :
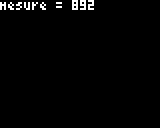
We now have a continuous reading of the value sent by our sensor. Yeat this value is not very clear. Here it will be a value oscillating between 0 and 1023, not great to represent humidity.
- So we’ll use a simple mathematical formula to transform this value into a percentage :
void loop() {
  // put your main code here, to run repeatedly:
  gb.waitForUpdate();
  int i32_value = get_sensor();         // Get a value measurement from the sensor
  i32_value = (i32_value * 100) / 1023; // Convert the 0 to 1023 range to a 0 to 100 % range
  draw_sensor_output( i32_value );                    // Display the percentage on screen
We easily transformed the analogic value between 0 and 1023 into a percentage, which is easier to understand for a human.
It turns out our sensor returns a higher value in a drier environment. To accurately show humidity we will operate a small change on our initial i32_sensor_value variable.
This allows for a greater value when humidity is greater and vice versa.
- Fixing this is really easy, we simply reverse our return value bu substracting it from its maximal value of 1023 :
int get_sensor() {
  int i32_sensor_value = analogRead(A1);       // reading from the analog entry A1, between 0 and 1023.
  i32_sensor_value = 1023 - i32_sensor_value ; // reverses the value.
  return i32_sensor_value ;
}
Steap 4 : adding a widget
Up until now we acquired a value from our sensor, changed it into a percentage to make it more understandable and displayed it on the screen. We will now add a visual representation in the form of a small gauge that fills up according to the value obtained from the sensor.
this part will be relatively simple but adds value to our program so there is no reason to skip it.
- We start by declaring a new function called draw_gauge() :
void draw_gauge( int i32_value ) {

}
Rather than using complex images (which we will see in other tutorials soon) we are going to use more basic functions of the console, functions that are included in our Gamebuino-Meta.h library.
Two functions are useful here :
-The drawRect() function that draws the outline of a rectangle
-The fillRect() function that draws a full rectangle
- We use both of these functions inside our draw_gauge() function in the following way :
void draw_gauge( int i32_value ) {
  gb.display.drawRect(5, gb.display.height()-15, gb.display.width()- 10, 10);
  gb.display.fillRect(6, gb.display.height()-14, (i32_value * (gb.display.width()- 12)) / 100, 8);
}
A bit of explanation : we start by drawing the outline of a rectangle, 5 units (or pixels) from the left-side of the screen and 15 units from the bottom (height - 15). Its width is equal to the width of the screen minus 10 units and its height is also 10 units. We specify the position of the top-left corner of our rectangle in a X-Y space with the first two values and its dimensions with the later two.
We then want to draw a full rectangle inside the first one. We offset it from the left side by one additional unit, with a horizontal position of 6, its vertical position is also offset by one unit to be 14 units from the bottom (height - 14).
The hardest part is to proportionate the lenght of our rectangle to the moisture value from our sensor. To achieve this we simply use a rule of 3, multiplying the value by the width of the screen minus 12 (so we fit inside our outlined rectangle) and we divide the result by 100. We also specify a height of 8 units to fit inside out outlined rectangle.
- We then need to call our draw_gauge() function inside our loop() function or it won’t do anything :
void loop() {
  // put your main code here, to run repeatedly:
  gb.waitForUpdate();
  int i32_value = get_sensor();         // on récupère la mesure du capteur
  i32_value = (i32_value * 100) / 1023; // convertit la plage 0 à 1023 en 0 à 100 %
  draw_sensor_output( i32_value );      // on affiche le pourcentage à l'écran
  draw_gauge( i32_value );              // on affiche une jauge pour représenter notre valeur
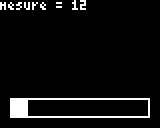
- Compile your code and upload it to your Gamebuino.
Could use a bit of color innit ?
- To add color we simply need to add the setColor() function between the drawing of our two rectangles :
void draw_gauge( int i32_value ) {
  gb.display.drawRect(5, gb.display.height()-15, gb.display.width()- 10, 10);
  gb.display.setColor(BLUE);
  gb.display.fillRect(6, gb.display.height()-14, (i32_value * (gb.display.width()- 12)) / 100, 8);
}
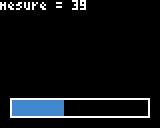
Note that I used the color blue by specifying the “BLUE” parameter in my setColor() function. You can choose any color listed in the setColor() API on our website.
The entire code written up to this point should look like this :
#include <Gamebuino-Meta.h>

void setup() {
  // put your setup code here, to run once:
  gb.begin();
}

void loop() {
  // put your main code here, to run repeatedly:
  gb.waitForUpdate();
  int i32_value = get_sensor();         // on récupère la mesure du capteur
  i32_value = (i32_value * 100) / 1023; // convertit la plage 0 à 1023 en 0 à 100 %
  draw_sensor_output( i32_value );      // on l'affiche à l'écran
  draw_gauge( i32_value );              // on affiche une jauge pour représenter notre valeur
}

int get_sensor() {
  int i32_sensor_value = analogRead(A1);       // lecture de l'entrée analogique A1
  i32_sensor_value = 1023 - i32_sensor_value ; // inverse la mesure.
  return i32_sensor_value ;                    // retourne la mesure
}

void  draw_sensor_output( int i32_value ) {
  gb.display.clear();
  gb.display.print( "mesure = " );  // affiche le texte "mesure = "
  gb.display.print( i32_value );    // affiche le contenu de la variable i32_value
}

void draw_gauge( int i32_value ) {
  gb.display.drawRect(5, gb.display.height()-15, gb.display.width()- 10, 10);
  gb.display.setColor(BLUE);
  gb.display.fillRect(6, gb.display.height()-14, (i32_value * (gb.display.width()- 12)) / 100, 8);
}
Congrats ! You now have a fully functionnal program that allows you to use your Gamebuino with a moisture sensor. You can use it to monitor the soil of your houseplants for instance.
All Gamebuino-specific functions are documented here : Référence - Gamebuino