Hi everyone.
Today we will see in just a few minutes how to display a static image on our Gamebuino Meta.
This tutorial is made with the Arduino IDE. If you haven’t installed it yet please follow our Installation guide to set it up on your machine.
Step 1 : Getting a usable image
Before putting anything on the console we need to have an adequate image. For this you can create your own image using a wide array of softwares such as Paint.net, Photoshop, Illustrator, Gimp, etc.
You can also find images on the internet, I personally use the Game assets section of Itch.io a lot, it’s full of original creations and most of them can be used freely under a creative common licence.
Please bear in mind that the standard display mode of our screen is limited to 80*64 pixels, so it’s better to stay within this size otherwise our image would not fit properly on the screen.
For this tutorial I will be using the Christmasbuino image. It comes from the Pixel holiday tree asset pack created by VladPenn.
The basic image is this one :
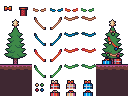
Using Paint.net (or any other sofware you’d like) you can use this image to create the christmas tree of your dreams using the tree on the left and the central elements. the tree on the right serves as an example.
After fidling a bit I got the following image I saved as a PNG file :
![]()
It’s only 32*46 pixels so it will fit perfectly well on screen.
Step 2 : Displaying the image on the console
Here we will start by using the amazing Image converter created by Steph.
Simply darg and drop your image file in the top left corner pannel, check that the “height” and “width” frames contain the same values and click on the “transcode” button. You should get the following :

We can now open our Arduino IDE and create a new file then save it under whatever name you see fit, I named mine “Sapinbuino”.
Then, click on the small arrow in the top right corner and select the “new tab” option in the drop down menu. Name the created file “Sapin.h” (or Tree.h in english).
In this new file we will paste the whole code generated by the image converter.
It creates an array called IMAGE_DATA that contains your image in the form of hexadecimal value, each corresponding the the color of one single pixel.
I strongly recommend that you rename this array by replacing “IMAGE_DATA” by a name of your choice, I personnaly chose “SAPIN_DATA”.
This is not mandatory here since we will be using a single image, but in the case where we’d use multiple ones it would cause us quite a lot of troubles since every array would have the same name and our program wouldn’t be able to differentiate them, so we rename them in order to make things easier.
All we need after that is to add a small line at the bottom of our file, just bellow our array :
Image Sapinbuino(SAPIN_DATA);
This allows us to declare an Image type variable called “Sapinbuino” from our “SAPIN_DATA” array.
Now let’s put this image on the screen.
For this we need to go back to our main tab and type the following code :
#include <Gamebuino-Meta.h>
#include "Sapin.h"

void setup() {
  // put your setup code here, to run once:
  gb.begin();
}

void loop() {
  // put your main code here, to run repeatedly:
  while (!gb.update());
  gb.display.clear();
}
This gives us a Gamebuino program basis ready to do anything we could ask of it.
The most important here is the small line at the top saying : #include “Sapin.h”.
It tells our program to import the Sapin.h file we just created, the one containing our image data and the corresponding variable.
From here everything is done using a single line of code. We simply call the “drawImage” function such as :
void loop() {
  // put your main code here, to run repeatedly:
  while (!gb.update());
  gb.display.clear();

  gb.display.drawImage(24, 17, Sapinbuino, 32, 46);
}
A quick explanation :
- The first two values will offset our image by 24 pixels horizontaly and 17 pixels vertically
- Sapinbuino is the name of the Image variable to display
- 32 and 46 are our image’s dimensions, starting with the horizontal value 32 followed by the vertical one 46
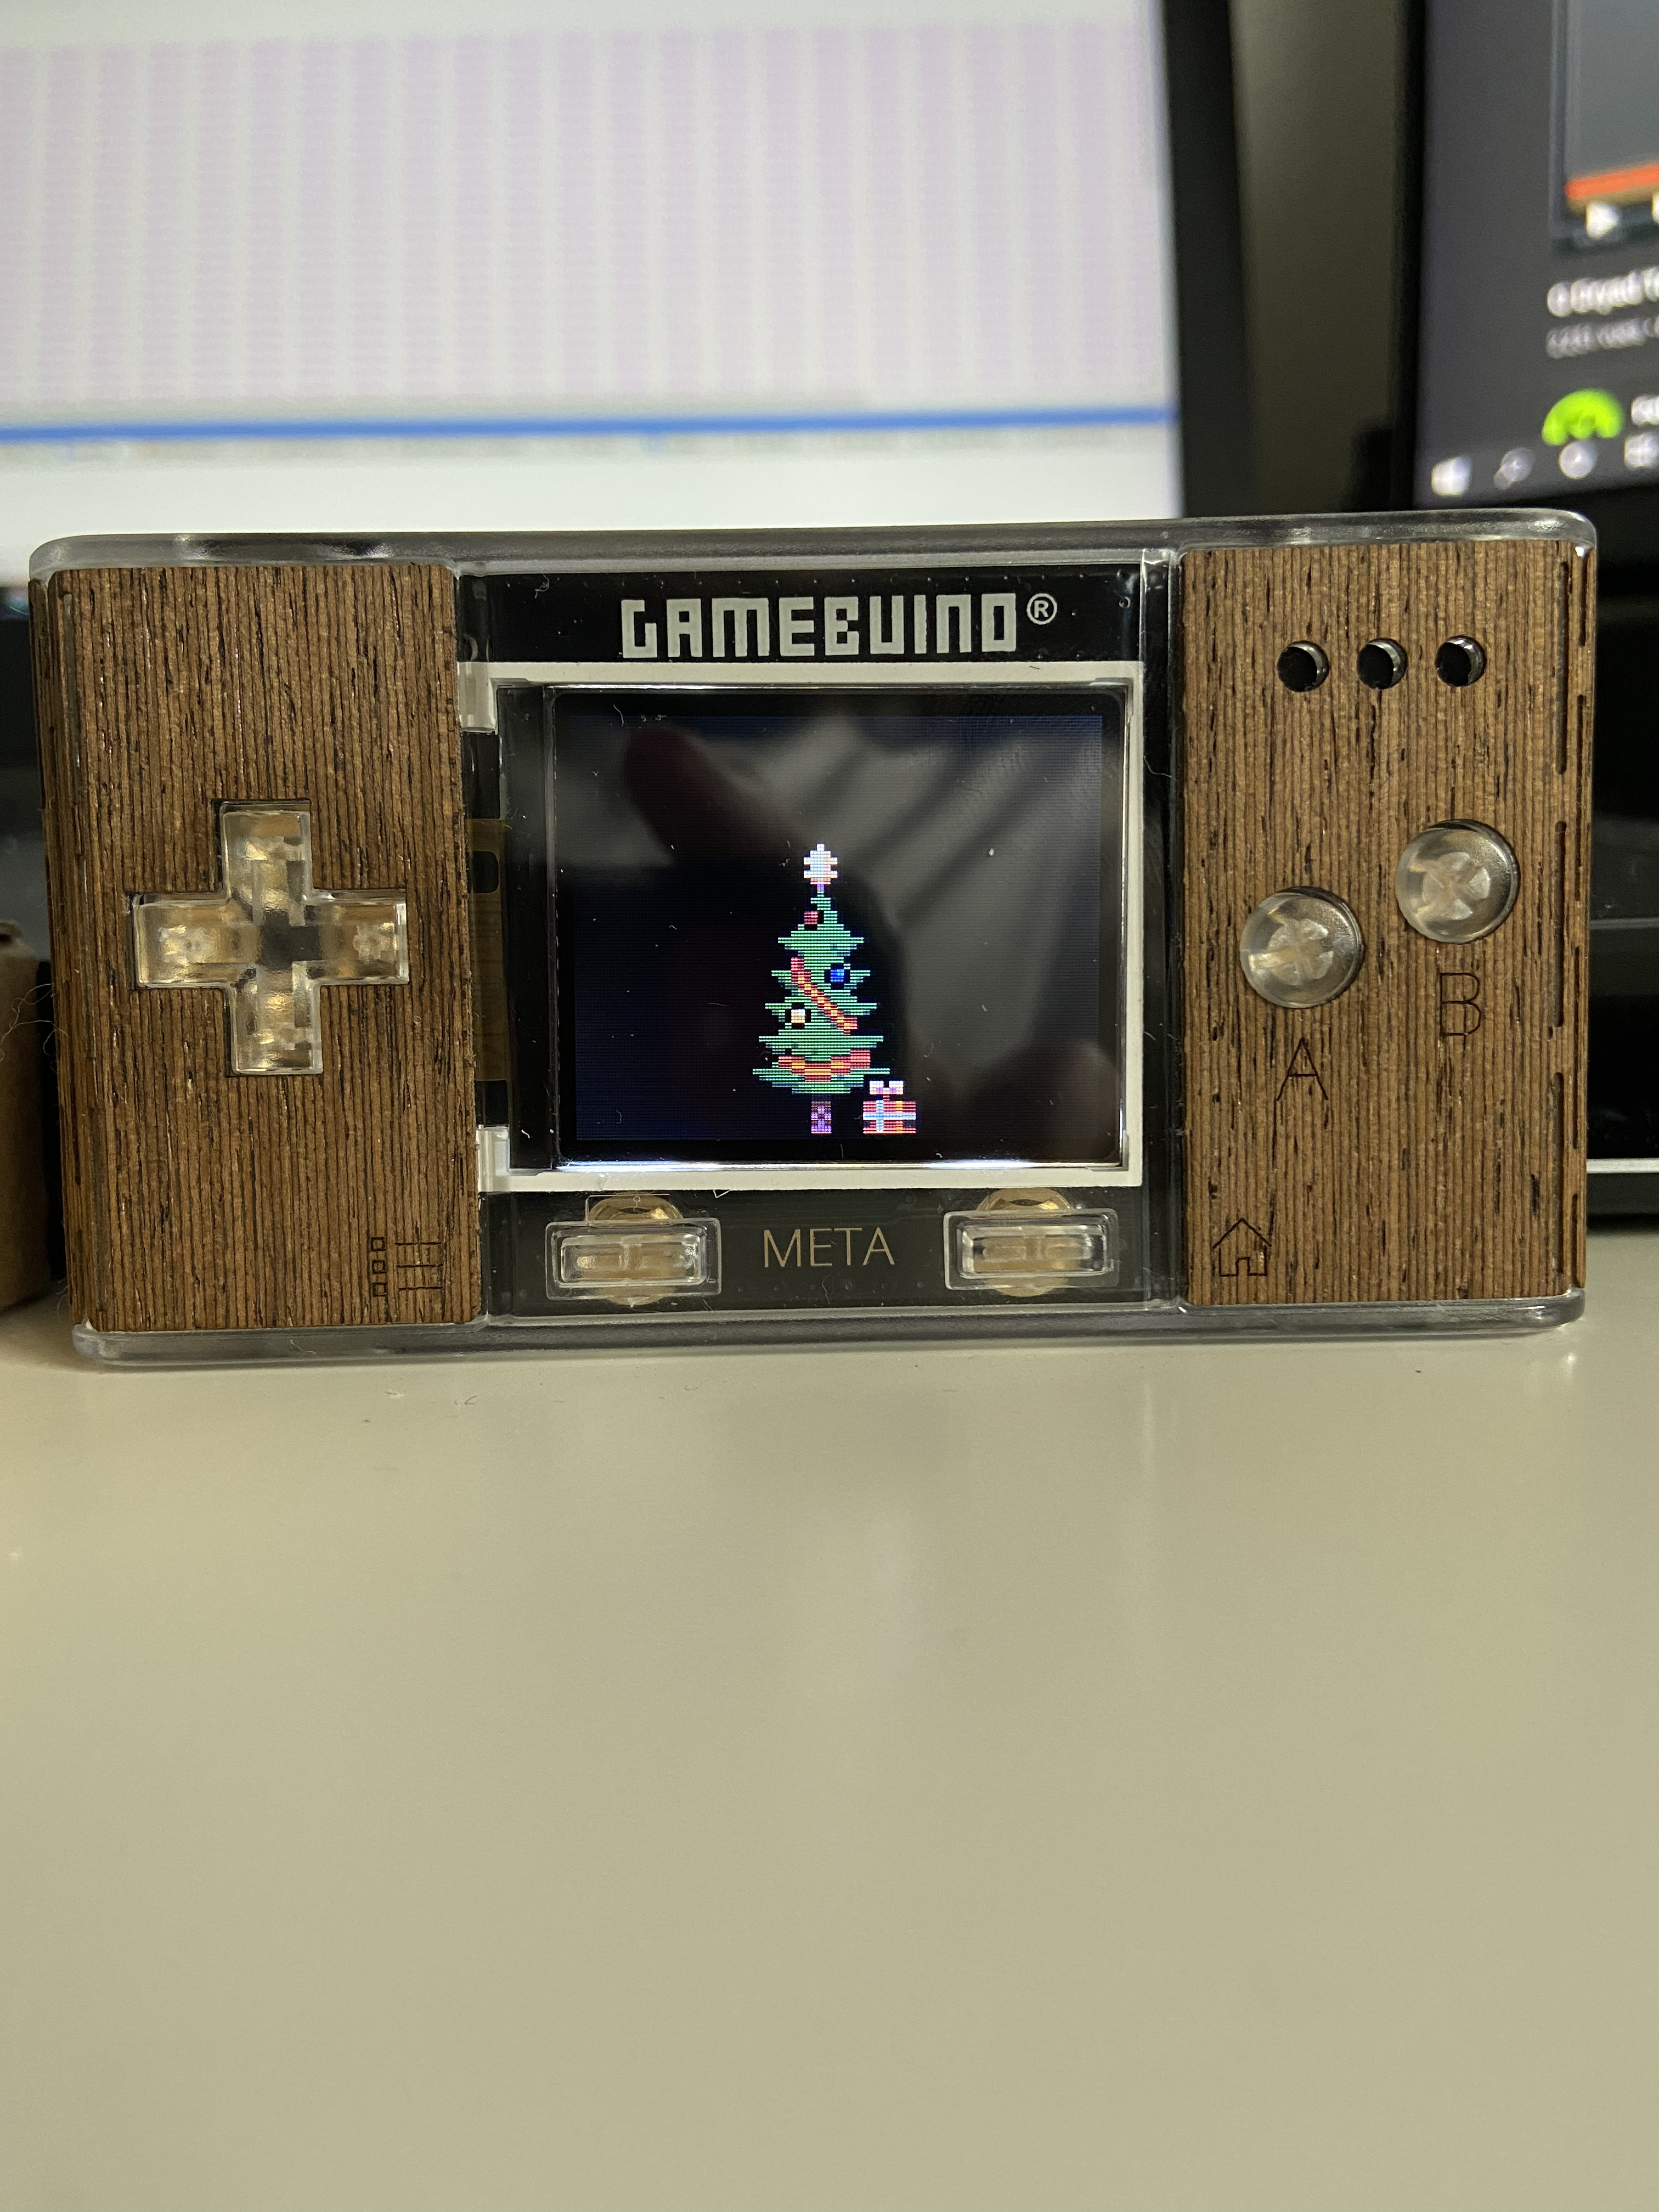
Once the program is compiled and uploaded to the console we get the following result :
Now it’s your time to shine, maybe train a bit using a few images you created or found on the internet. Try using multiple ones at the same time.
See you soon for more Gamebuino adventures.